This is from the girls at Crop Suey. They always have great tutorials so please give them a look-see!
Showing posts with label Crafty Stuff. Show all posts
Showing posts with label Crafty Stuff. Show all posts
Sunday, January 3, 2010

Saturday, January 2, 2010

Thursday, December 10, 2009

Thursday, July 9, 2009
Wall Art with Fabric
Grab your staple gun and let's get started. This is an awesome project to do and you can also switch them out by the season if you so desire. Thought this tutorial by Whiz Bang Fabrics in S.F. was awesome. I thought I could take pictures of mine, but their tutorial was way more effective. I have a canvas that has a hole in it and this is what I did to cover it up. When life gives you lemons..................
Friday, April 24, 2009
This Is My 100th Post - Wahoo!!!!

Wow! I just hit 100. It took me a while, but I finally made it. So I am having a little giveaway for one lucky girl who posts me a comment. I am not going to reveal what the prize is, but it's cute and simple and I think you will like it! Giveaway will end on Wednesday, April 29th. Winner will be announced on April 30th.
Doesn't this pic above make you want to run to Starbucks right now? I have needed one of these all week long! It's been a rough one. Hope everyone has a wonderful Friday!
Doesn't this pic above make you want to run to Starbucks right now? I have needed one of these all week long! It's been a rough one. Hope everyone has a wonderful Friday!
Wednesday, February 18, 2009
It's Been A While

I'm back. It's been a few weeks. We are still fighting illness. Scout is much better, I came through my bug, but now the Peanut has a virus with croup. Tis the season for illness. So, I have been busy with sick kids, and distributing Girl Scout Cookies. I have already polished off a box of Thin Mints. They are my favorite.

I did make some time for crafts last week. I made about eight little tissue holders for Valentines Day. The first one I made was Betty Boop on a Harley for my good friend Michele. She and her husband Johnny love their motorcycle and are totally into their customized bikes. Check out their blog to see Johnny's creations. The tissue holder came out really cute!
I bought a yard of Valentines Day fabric to use for various projects and thought that these tissue holders were the thing to make. The girls loved them! I don't give the girls candy on Valentines Day. I know, what a boring Mom. This year, they got tissue holders and Valentines Day books. They thought they were cool! If you would like this super simple pattern for these tissue holders, check out one of my favorite blogs : Skip To My Lou
I also busted out several batches of Valentines brownies for different friends! I used Martha Stewarts idea about cutting them out with heart cookie cutters and also used another tip that she had on her show to get the brownies out of the pan without greasing it. I used parchment paper to line my pan, and lifted them right out. Go Martha! You are the best!!! It worked great. Most of you probably already know that trick, but I am just a little behind the times.
The Peanut wanted to make goody bags for her class party. I usually try to be really crafty and creative, but this year, it was all about the dollar store. I spent way less money and I think they turned out really cute.
So that was the week that I didn't blog about. Next project.......salt dough ornaments!
Tuesday, January 20, 2009
Organized Craft Room Ideas : Organizing : Home & Garden Television
If only my craft room could look this awesome!
Organized Craft Room Ideas : Organizing : Home & Garden Television
Organized Craft Room Ideas : Organizing : Home & Garden Television
Monday, January 19, 2009
Photocraft Emboridery
I have been embroidering since I was about seven years old. My Grandma Margie (the seamstress extraordinaire) taught me when I went to stay at her house for a week in the summer. It was love at first stitch! My first piece was a dishtowel that I made for my Mom with two little bees on it. If I find it, I will post a picture. I was so excited to give it to her, that I couldn't wait for her birthday and handed it to her as soon as she stepped out of the car to pick me up. I was so proud. I love the gratification that you get when you finish an embroidery piece. I haven't embroidered in a while and recently got back into this fantastic craft. I found this video on YouTube and thought that this was such a cool idea for some gifts for friends and family.
Friday, January 16, 2009
Daisy's Dahlias
 It's been a while since I have showcased any of Petunia's Peeps, so I wanted to share this little one that I painted for my kitchen. It is entitled, "Daisy's Dahlias." I just love the pattern on her dress and the orange and blue. I hung her by a black and white polka dotted ribbon. She is very cute! I have been working on three other large pieces for both of my daughters' rooms that I will show next week. Hopefully I can't get them done by then. Maybe I will actually have enough time to paint one and stick it in my etsy shop for sale. Ha Ha. We shall see!
Friday, January 9, 2009
Styrofoam Wall Art

Here are a couple of pieces of artwork that I made for my office space. I thought they were kinda cool and pretty easy to make. Here is what you need:
1 sheet of Styrofoam 24 inches in length and 12 inches in width and 1 inch in depth. If you can't find one that size you can cut it down to fit.
2 sheets of 12 x 12 inch scrapbook paper (the sky is the limit when it comes to your motif, so go wild)
96 inches of 1 inch wide black (or whatever color coordinates with your papers) grosgrain ribbon
Styrofoam glue (can be found at Michaels) or any other super tacky glue.
1 super sharp box cutter and cutting mat or electric knife
First you want to cut down the Styrofoam so you have two 12 x 12 square pieces. I used a sharp box cutter for this, but you want to make sure that you really get a straight edge when you cut it. Mine is pretty lumpy bumpy. An electric knife is great for cutting this, just be careful.
Next you want to put a good amount of glue on the back side of the scrapbooking paper.
Make sure it is lined up neatly with all four corners of the Styrofoam, and adhere it. I would highly recommend using a heavy book to set on top of the piece while it dries. It helps it adhere well and keeps the bubbles out. I purchased the Styrofoam glue at Michaels and was not very impressed at first. Styrofoam is so porous that it is really difficult to get the glue to work properly. I did let mine sit for 24 hours and it did adhere after all.
Finally, you are ready to attach your ribbon. Each piece is going to use 48 inches. Embarrassingly enough, I had a tough time figuring out how much ribbon I was going to need. And then I realized, "Duh, the piece is 12 inches square. Do the math, dummy." It was not one of my better moments. So you want to attach the ribbon to each side using the glue. Again, this can get pretty tedious because that darn Styrofoam just doesn't want to attach, but, have some patience and let the glue set awhile. I promise, it will work.
So there you have it. Two pieces of simple art for your wall. I placed a small finish nail in the wall to hang them and slid the Styrofoam right onto it. Very inexpensive art and so cool that you have infinite paper possibilities. The papers today are so nice and artsy looking, they really make a great statement!
Thursday, January 8, 2009
Repurposing A Hunk of Junk!

I am a recycling queen. I love to recycle! I try to be good about recycling all of our glass, cans and bottles. It drives my husband nuts because I go diving into the trashcan when he throws away something that could actually be recycled. I am also a bit of a scavenger. I love it when the street has free dump days and everyone puts out their respective "trash" on the street. I have made some pretty good finds over the past several years: An antique Sacramento milk crate, a wicker footstool and my last great find was a fire engine red rocking chair with some vintage nursery rhyme motifs that had been decoupaged. Sorry, no pic.... I gave it to Kim for all of her children's photography props.
So last year the family and I headed up to my in laws house for the day. They live on a sprawling eight acres. They had a huge area in the back that kind of served as a "dump" pile of stuff they needed to get rid of. I quickly scanned the area and spotted the "piece de resistance" - and old metal grate. What? A grate you say? Yes, an old grate. My husband and his buddies had found this old huge hunk of metal one day when they were down at the river doing what boys do and thought it would be cool to store their fishing gear in while they swam across the river. It looks almost like an old bread tray that the grocery stores have for display. I nabbed that up and asked my in laws if I could take it home. I think they thought that I was a little nuts, (which I am) but I had the perfect use for it, and they were thrilled to have me take it off of their hands. It makes a fantastic paper holder for all of my scrapbooking paper. When I get to marry my recycling and my great scavenger abilities it makes me so happy!
The grate measures about 2 ft x 2ft and is about 2 inches deep and fits perfectly on the top of my printer shelf. I can just slide it in and out when I need to use it. I think my husband was a little worried when I decided to take it home, but I think it is great repurposed as my paper holder. Very urban chic don't you think? Ha Ha! I love it when I can repurpose a big hunk of junk and save it from being dumped into a landfill.
Monday, January 5, 2009
When Life Hands You Lemons - You Make a Cool Collage
 So I have been trying to find some good uses for all of my scrapbooking supplies that I am obviously at this point, not going to scrapbook with. I thought that this was a pretty cool idea and wanted to share it with all of my friends out there in Blogland.
I had purchased two 16x20 inch canvases from ye ol' Michaels to make some paintings for the Peanut's room and attempted to open them up when I got them home. I used the old "poke a pencil through the tauntly wrapped plastic trick," and needless to say, it poked a hole right through both of the new canvases. Ahhhhhhhhhhh! I couldn't return them, so I thought why not figure out a way I could use them. Hey, I am a crafty sort of Magyver girl, I could do this! I generally use quite a few papers in my paintings anyway, but I really didn't feel like I could cover it up well enough to mask the rather large holes, so I decided to make a collage of sorts instead. Something that could cover up the whole thing.
Here's what I did:
I just used a few scrap pieces of paper that coordinated, an 8x10 pic of the girls (I think black and white is so timeless), some buttons and sparkly chipboard letters.
I just used my Modge Podge to glue the papers down to the canvas after I cut them and collaged them to my liking; then I added the pic with some photo corners for some easy photo changing if I opted to eventually change it; then I attached the chipboard letters with Elmers glue to read: Sisterly Love; after that I decided to add a few buttons with the hot glue to spruce up the corners that were looking a bit sparse; and lastly, I used some black acrylic paint and painted (not very neatly) around the edges. I got some paint on the canvas, but I thought it looked cool, because it almost appears to be inked.
This is a great project if you can get the canvas on sale and have a lot of the scrapbooking supplies on hand. The project only took me about a 1/2 hour and would make a great gift for someone. This one is hanging in the office in the kids nook where their desk and play kitchen reside. I love how mistakes can turn out to be fabulous things sometimes!
Friday, January 2, 2009
Crayon Roll - Tutorial Link
Here is the link for the tutorial on how to make the kids crayon roll. It's a great tutorial and a super cute blog called Skip To My Lou! My bff Kim used rick rack on hers and had a difficult time with it. I think they look cute either way.
Thursday, January 1, 2009
2009! - No Way Jose!

Happy New Year! I can't believe that we are in 2009! My husband made it home last night a little early (11:00 p.m) so we were able to watch the ball drop together in Times Square and get a midnight kiss. When my brother called me today, he asked me what I did for New Years. You see, he is still in his 20's, single, with no kids. I kinda laughed and said, "What did you think I did? I sat home and watched an On Demand movie on the couch after the kids went to bed and watched all the partiers in Times Square freeze their butts off. I was secretly living vicariously through all those partiers. But alas, I had my day in the sun to stay out all night on New Years Eve and party like a rock star. Now, I would much prefer to stay in my jammies on the couch with a movie and have my girls snuggly snoozing away in their beds. That's how I know that I am officially matured. Ha Ha. So all in all, it was a good New Years.
I of course have not posted in forever and a day, but I wanted to post my cute little crayon carrier that I made for my little cousin Abigail for Christmas. My bff Kim and I decided that we wanted to tackle a Christmas craft project this year and thought these crayon holders would be just the ticket. Kim has much better math skills then I do, so my measurements somehow got a little mixed up, but, it still turned out pretty cute. They are actually pretty easy to make although a little tedious to get everything prepped. I made mine to fit sixteen crayons, but you can make them to fit eight if you prefer. My next project is to turn one of these into an apron. I think they would be so cute.


Tuesday, October 21, 2008
Black Apple Dolls
 A couple of weeks ago the Scout came down with the creeping crud and my husband and the Peanut decided they would make our scheduled trip to the family cabin without us. We didn't want to risk the ear infection. Guess what, she got the ear infection anyway! So while the Scout and I sat at home a wee bit bored in front of the TV, I thought we might get the sewing machine out and whip out a couple of Black Apple Dolls. I had been watching Martha Stewart a few weeks before and saw my favorite crafty girl, Emily Martin of The Black Apple being interviewed. She showed the audience how to make these cute dollies and then put a free pattern on Martha's website. How sweet is that? So I ran in and hit the print button in a jiffy and was waiting till I had a bit of time to whip up these little darlings. I really wanted to do them in a Halloween print with some goth black hair. I have tons of Halloween scraps laying around since it happens to be one of my favorite holidays.
I think the dolls came out really cute and my girls were so excited to get a little gift for Halloween. I did fudge a bit on the faces. I didn't have any canvas but I did have some old muslin curtains that my mom was getting rid of that worked fantastic. I also want to suggest to NOT use a Sharpee marker for the faces as I did. Invest in a nice fabric marker like I should have.
Here is a link to Emily Martin's tutorial: Black Apple Dolls. I hope you enjoy it!
Be sure to stop by my other blog at Cowgirls and Cupcakes and leave us a comment or send us a recipe via email to get you qualified for our 2nd big giveaway!
Wednesday, June 11, 2008
Favorite Things Swap
Because you know that I love to get things in the mail ..... I had to do it..... I joined "My Favorite Things SWAP" over at According to Kelly. If you haven't checked out this blog yet, please do so. Kelly has great posts and well worth a look see. For this SWAP we will have to send our SWAP partner three (or more) of our favorite things. I have a few ideas already stirring around in my brain and have already purchased one small piece of a favorite collectible glass at the thrift store. I wont' reveal any more than that because I want it to stay a surprise for my partner. I will post pictures after the SWAP is complete at the end of June. Can't wait to open my mailbox!
Sunday, June 8, 2008
A couple of things...
I have missed so much blogging and the only excuse I have for it is the Peanut catching a really bad virus that turned into croup. Lovely stuff. The humidifier, 7-up and SpongeBob have been running pretty much 24 hours a day around here. Now, I have the creeping crud too. What a bummer! Anyway, I will have to play a bit of catch-up now, so there will be quite a bit of info in this post.


 The jam came out great. We ended up having eight large jars. My contribution was the pictures and the artsy labels. We have already given away seven of the eight jars so we will be bustin out some more pretty soon here.
First and foremost, I have to catch up by posting about the Jazz Festival. It was weeks ago now, but wanted to post about how much of a good time we had. We have family friends Matt and Sherri Colby-Bottel that play in the Blue Street Jazz Band at the Festival. I have seen Matt and Sherri perform on many occasions but have always wanted to see them play at the Jazz Festival. We didn't purchase tickets because we were unsure how long we would actually be able to stay at the festival with two small kids. We checked out the schedule the night before and knew they were playing at the Downtown Plaza Piazza, so we went to check it out. They have the Sacramento Brew Pub and Grill convenient placed across the way from the stage so we decided to break for a little lunch and see if we could snag a patio seat to watch the show. We were able to score a table outside and had a nice lunch. The band showed up and played. Sherri wasn't singing until the next venue, so we definitely wanted to stick around till the next show. All of the band members were fantastic, and as you can see by the pic above, there was a whole lot of dancing going on. The band is situated all over the United States. Matt and Sherri currently reside in Louisiana where Sherri is finishing up her doctorate program and Matt works out of their home as a computer program designer. Their music is described as "New Orleans jazz with a mix of swing, Mardi Gras, folk song, marches, waltzes, Latin music, and hymns." Truly an eclectic mix. I would highly recommend checking out their website for a look see and a listen too. I just noticed that they also have a myspace with one of my new favorite songs, "Creole Song," which is truly amazing to listen to. We made our way over to the Pizza Pavilion for their next show. We didn't buy tickets, but there were places on the street that you could see into the show. To our surprise, Sherri worked her magic and got us in to see their show. It was great, and the kids enjoyed dancing it up. I always enjoy watching people perform when you know they love what they do. Matt has been playing the banjo for as long as I can remember. His mom and my mom have been best friends since kindergarten so I have known him for many years. Sherri does all the vocals and has been singing with the band since she was thirteen. Here is a pic that the hub took after the show. The band will be celebrating their 25th year together this year! Congratulations to the band and a big Thanks to Matt and Sherri for a great time at the Jazz Festival!
That same weekend we took our first trip ever to our local farmers market. It was fun. A little more pricey than what I had expected, but it was still cool seeing all the fresh produce and flowers. I did have to break down and buy some fresh flowers for my kitchen. I couldn't resist. They also had a man there that had bottled his own olive oil. He was Italian of course, and greeted my daughter with a "Ciao Bella," he was probably in his sixties but I was in love. The accent gets me every time. If I went to Italy or Ireland I may never return. Ha Ha. Sorry cute husband of mine, you know that I am just kidding! So I am definitely going to return to buy some olive oil from him when I run out of the 50 gallons that I just recently purchased from Costco.
We were on a mission when we went to the Farmer's Market, we were on a strawberry mission! We planned to go home and bust out some yummy strawberry jam that afternoon. The prices were pretty high for strawberries, so we jumped in the car and ran down the street to the local strawberry stand where we scored a flat for only $18.00. A true bargain especially when they were just picked that morning. The car smelled like a giant strawberry shake by the time we got home. My husband has made jam on one other occasion and I, myself, have never made jam. My Grandma makes jelly and jam by the droves every year. She is truly and incredible woman, one that I will have to dedicate a whole post to. Like I said before, I have never made jam so the hub took over the jam making process with the girls and I shot the pics. Here are couple of the yummy ones:
 The jam came out great. We ended up having eight large jars. My contribution was the pictures and the artsy labels. We have already given away seven of the eight jars so we will be bustin out some more pretty soon here.
Another thing that I have been meaning to blog about was a great new blog and website that is from the creative minds of a few of my Craft Mafia sisters. Its called Pimp Stitch.  If you love embroidery as much as I do, you will definitely want to check out this site. They are offering a free pattern a week until their opening of their site late this month. So head on over and check out the creative brains of Amy Cluck of Peptogirl, Missy Balance of Mohair Circus, Tamie Snow of Roxycraft and Lauren Brandy of Goody Goody. Please go and "Pimp Your Stitch!"
If you love embroidery as much as I do, you will definitely want to check out this site. They are offering a free pattern a week until their opening of their site late this month. So head on over and check out the creative brains of Amy Cluck of Peptogirl, Missy Balance of Mohair Circus, Tamie Snow of Roxycraft and Lauren Brandy of Goody Goody. Please go and "Pimp Your Stitch!"And speaking of Mrs. Missy Balance. I received a fun package in the mail the other day that had such cool things inside. I had ordered one of her spool doll cell phone charms off of her etsy shop.  It is so cute and looks quite good with her dark bobbed hair and my pink razor. She also included some super cute tags that say "Hey Cupcake" made with one of her Amuse stamps that she designed. This girl is multi-talented! I love the cupcake tags and am now going to have to purchase this cute stamp because we are having a cupcake party for the girls birthday and this stamp is just what I need. So thanks Missy!
It is so cute and looks quite good with her dark bobbed hair and my pink razor. She also included some super cute tags that say "Hey Cupcake" made with one of her Amuse stamps that she designed. This girl is multi-talented! I love the cupcake tags and am now going to have to purchase this cute stamp because we are having a cupcake party for the girls birthday and this stamp is just what I need. So thanks Missy!
Wednesday, May 28, 2008
Pink of Petunia's Peeps

Here is Pink of Petunia's Peeps. She's a fighter, a survivor, a hero. She helps fight breast cancer by wearing pink. Stacey of Bouton Blue, one of the winners of my pay-it-forward contest and long time friend, is now the proud owner of Miss Pink. Stacey graciously walked about a bazillion miles last year in the breast cancer walk. I so appreciated her dedication and willingness to support many of the women and men who have come face to face with breast cancer. Thank you Stacey, I hope you enjoy your peep!
Wednesday, May 21, 2008
A Gift In The Mail

I love getting mail. I wish everyone would just stop emailing and go back to writing letters, it would make me so happy. I have always had an affinity for stationery and pens, stamps and sealing wax; so you can imagine my delight when I opened up the mail the other day and found the best present waiting for me. It was personalized stationery made for me by the very talented Melissa Haworth of Haworth Handmade. She is also a fellow Craft Mafia sister of mine. I didn't realize till I opened them, that there were many different designs that she had included. How awesome is that! I was a winner of her pay-it-forward contest on her blog and this was my prize! It is so fabulous, I can't wait to write a note and send it on. Thank you Melissa for my nice present and for spelling my name correctly!! I love them!


Monday, May 19, 2008
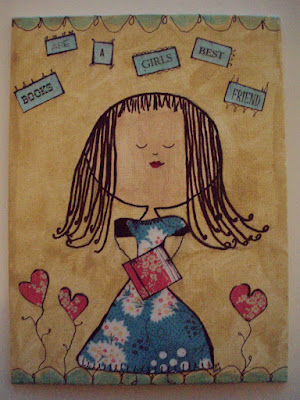
Petunia's Peeps
For a while now I have been calling my little "people" paintings by the title, "Little Folk Art Primitives." I decided that it sounded boring and needed to be kicked up a notch, so I settled on a new name for these little folky divas. I am now going to refer to them as "Petunia's Peeps!" I love it when people use the term "peeps!" So here are a few of the recent creations that went out to the pay-it-forward winners. I still am working on two more and almost have them complete. They are so much fun to paint and I really tried to capture the winners interests in my paintings.
Here are a few of Petunia's Peeps that are proudly displayed somewhere in America!


Subscribe to:
Posts (Atom)